
Set up signing keys
Set up signing keys
A release build is signed, and each store has its own rules. Apple and Android
must be signed to ship at all. Windows Authenticode is optional, and an unsigned
.exe still runs. Linux has no signing model.
This step needs an Apple Developer account and a Google Play account.
Studio's Signing tab has one sub-tab per platform and shows what each has and
what it still needs. Signing material is copied into .peko/keys/<platform>/ in
the project, and passwords go into the operating system keychain. Keys are never
uploaded, not during a deploy and not to the platform. Signing happens on your
machine.
CLI:
peko keys verifyreports each platform's requirement and what is present.peko keys listshows what is registered.
Android
One step. Studio generates an upload keystore and registers it.
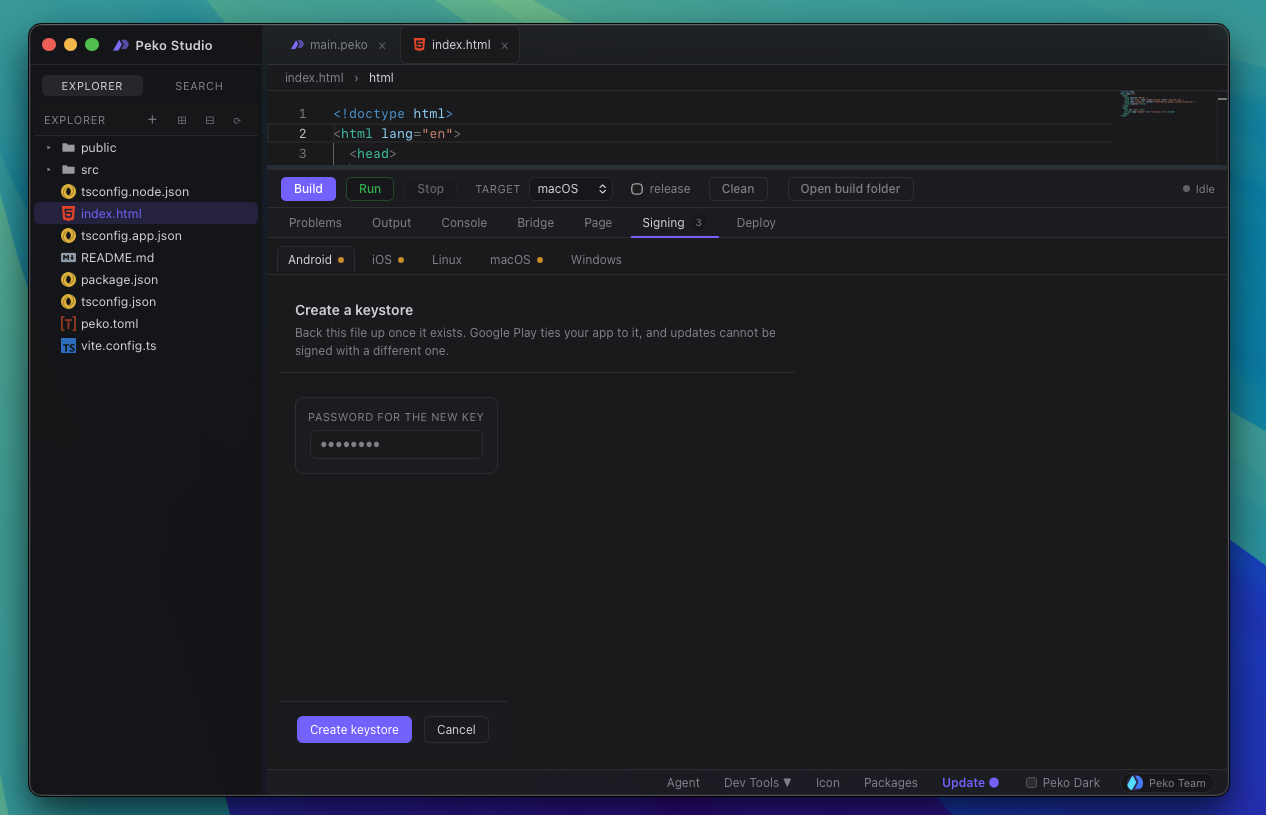
CLI:
peko keys generate --platform android --password-file pw.txt
Back that keystore up somewhere you will not lose it. Google Play ties the app listing to it, and an update signed with a different key is rejected. There is no recovery path you control.
Apple
Apple issues the certificate, so this is a round trip: you generate a request, Apple turns it into a certificate, and you bring that back.
1. Create the signing request
Studio generates the private key and a .certSigningRequest, keeping the key
locally.
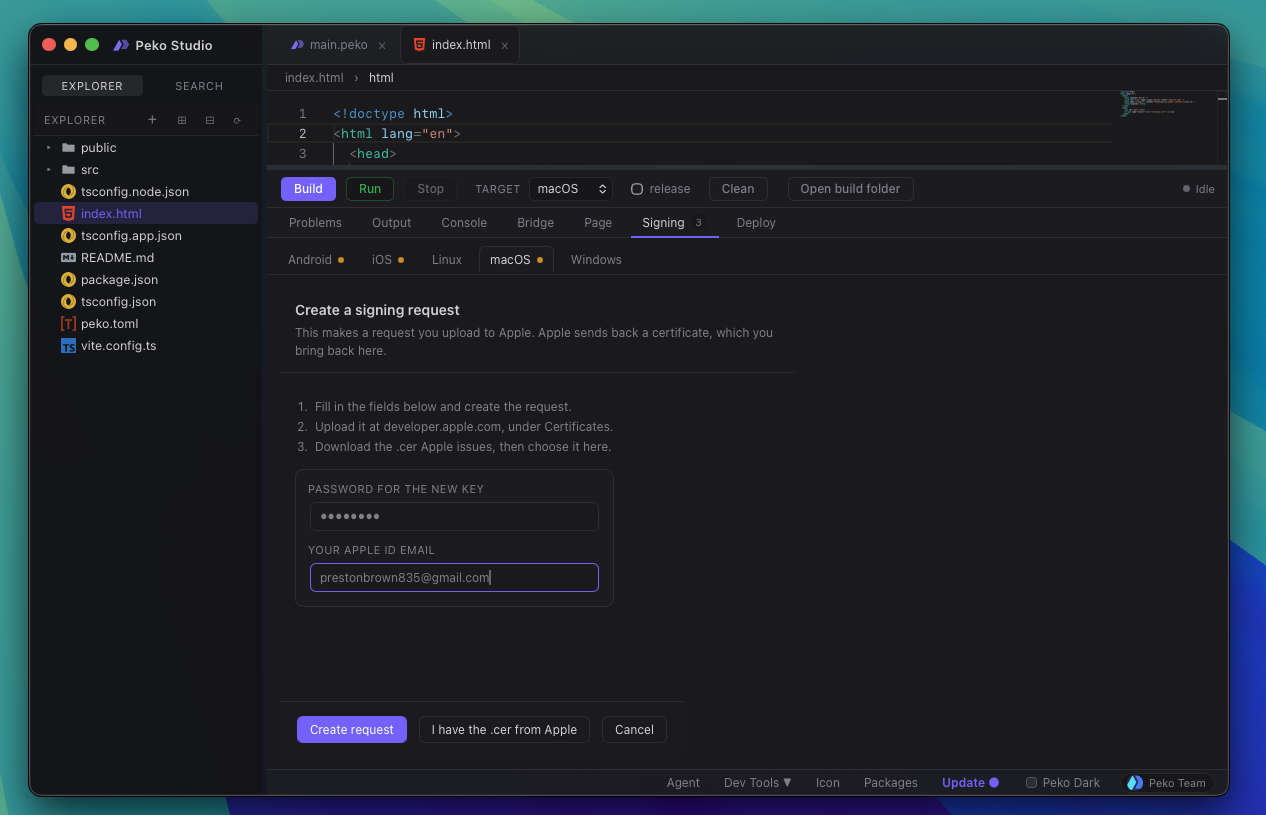
CLI:
peko keys generate --platform apple --email you@example.com
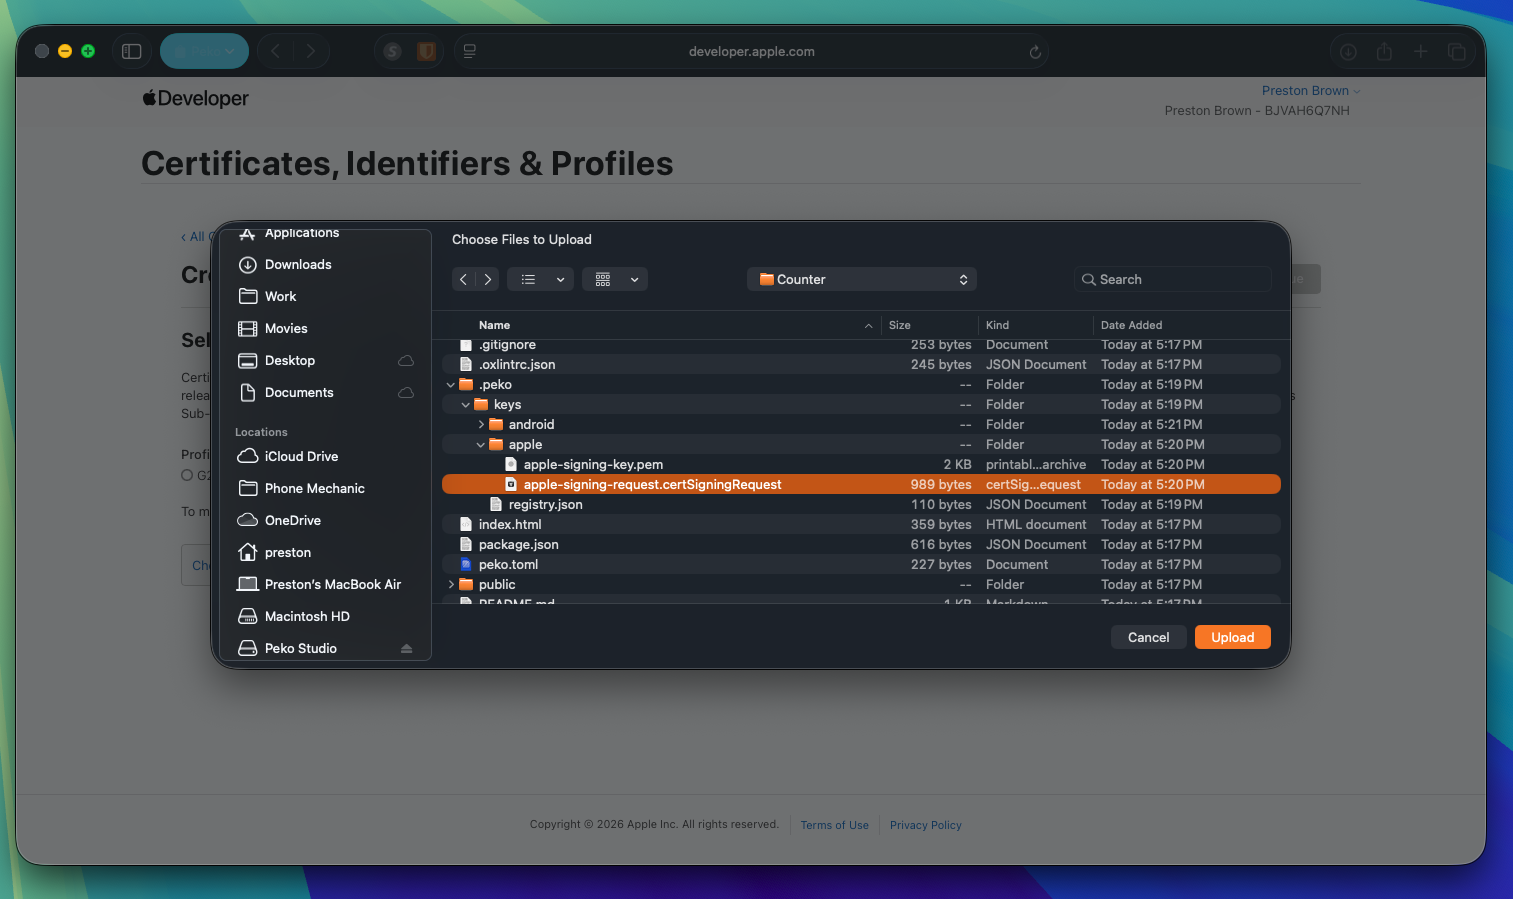
2. Give the request to Apple
Upload the .certSigningRequest at developer.apple.com under Certificates, and
download the .cer Apple issues.
3. Bring the certificate back
Give the downloaded .cer to Studio. It pairs it with the key it kept and
produces the .p12 the bundler signs with.
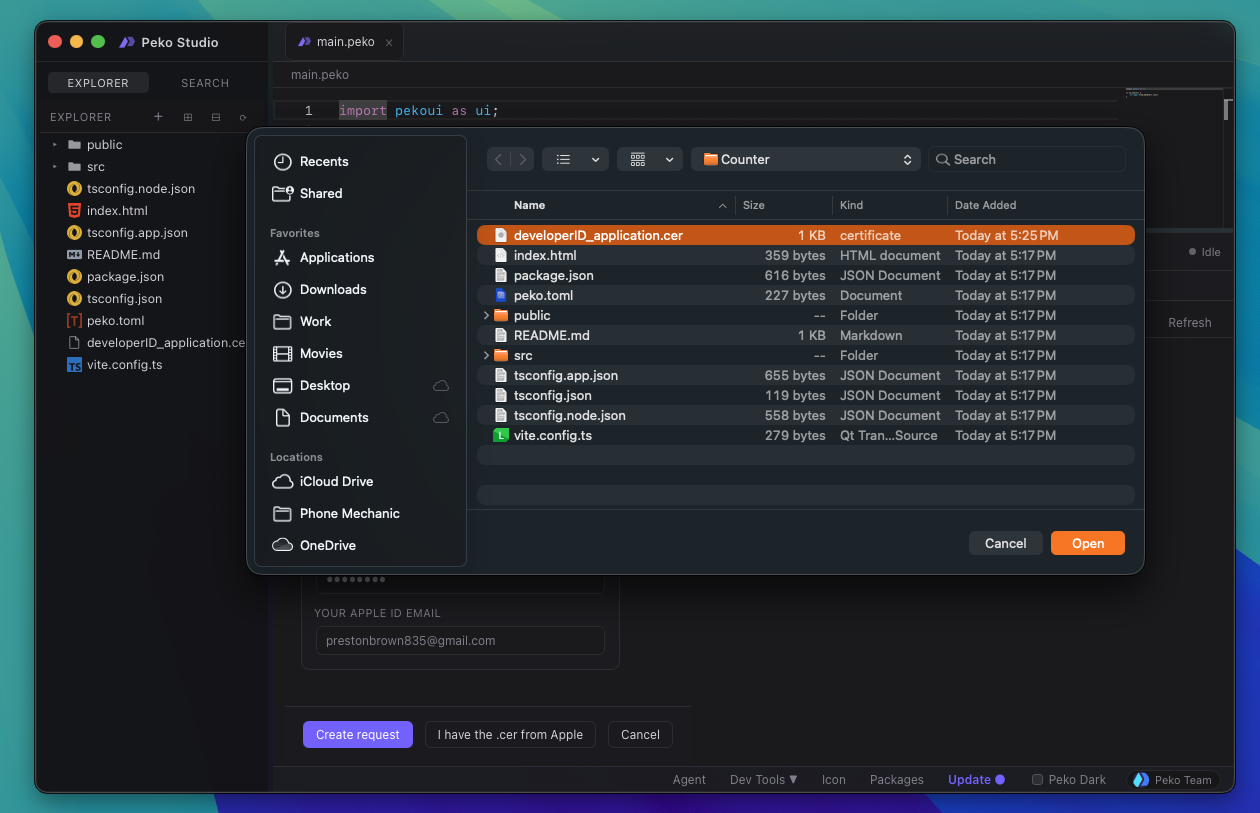
CLI:
peko keys p12 --platform ios --cer downloaded.cer --password-file pw.txt
At this point the app can be signed. Shipping it to a Mac that is not yours needs one more key.
4. Download the notarization key
A macOS app has to be notarized or Gatekeeper blocks it on other people's
machines. That uses an App Store Connect key, a .p8 file, created in App Store
Connect under Users and Access, Integrations.
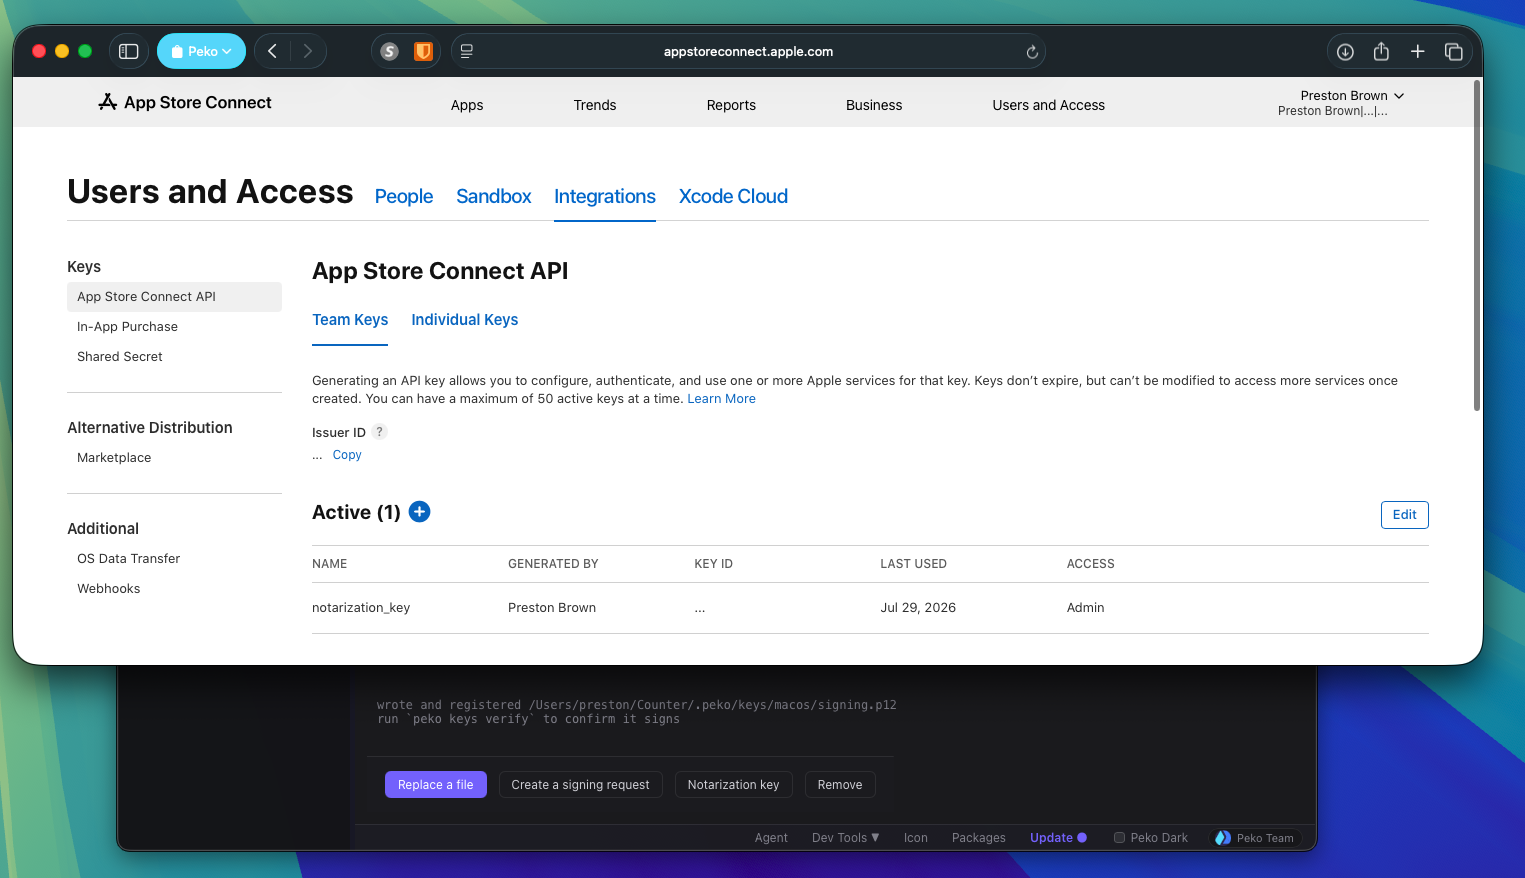
Apple lets you download a .p8 once. Save it somewhere permanent before leaving
the page.
5. Register the notarization key
Give the .p8 to Studio in the same tab.
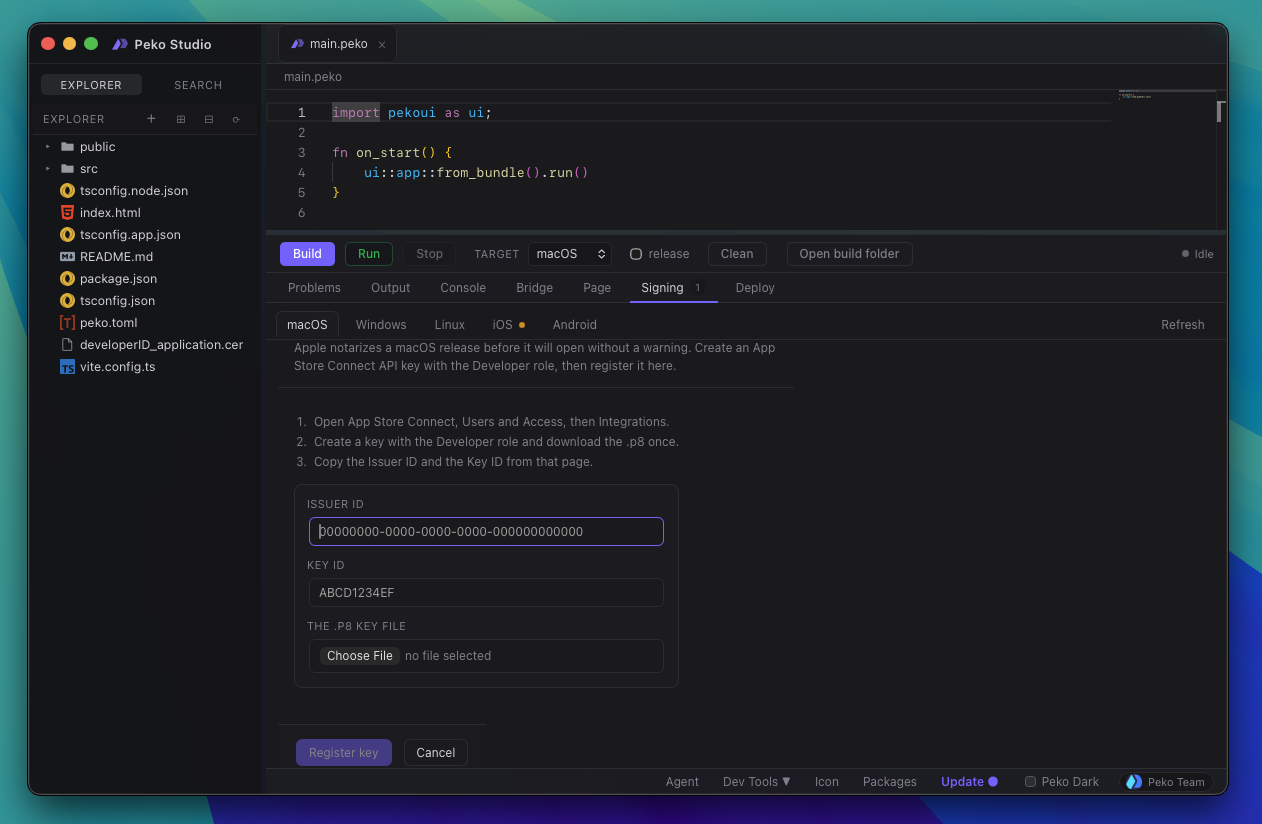
Without it the build still succeeds and warns, and the app you get is signed but not notarized.
If you registered keys from a terminal while Studio was open, press Refresh in the Signing tab. Studio caches the verification result.